
Ori and the Blind Forest Speedrun: Routes and Tricks
Plan your Ori and the Blind Forest speedrun with beginner routing tips, All Skills skips, energy management, and practical advice for a faster finish.
Jump to
How to Start an Ori and the Blind Forest Speedrun
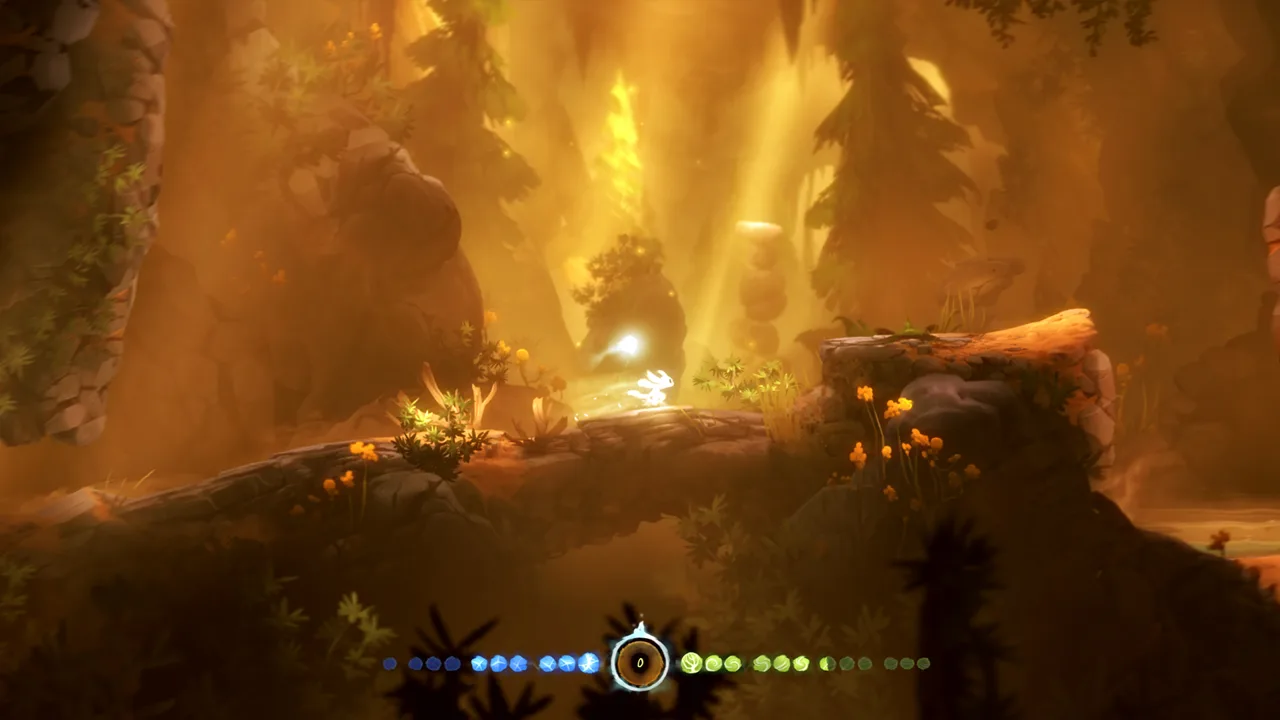
An Ori and the Blind Forest speedrun turns familiar platforming rooms into a connected movement puzzle. Learning the route helps you cut backtracking, manage energy, and reach the ending without wasting attempts on unnecessary risks. Start your Ori and the Blind Forest speedrun by choosing between an achievement-focused finish and a leaderboard category, then practice the movement that route actually needs.
For the Supersonic achievement, your target is finishing the game in under three hours. You can reach that goal through the intended story route without major glitches. Advanced Definitive Edition runs go further, using carefully timed level-ups, cutscene skips, and sequence breaks to rearrange progression.
Choose Your Version and Goal
The original game and Definitive Edition need separate routing. Definitive Edition includes Dash and Light Burst, both of which feature in its advanced All Skills route. Avoid mixing an original-game achievement walkthrough with a Definitive Edition glitch tutorial.
| Goal or category | Objective | What to plan around |
|---|---|---|
| Supersonic achievement | Finish in under three hours | Direct navigation, dependable platforming, and fewer deaths |
| Definitive Edition All Skills | Collect every skill and finish | Skill acquisition order, movement combinations, and sequence breaks |
| Definitive Edition Any% | Reach the ending under the selected rules | The category’s permitted shortcuts and restrictions |
| Definitive Edition All Cells | Collect all cells and finish | Collectible routing alongside progression |
All Skills does not mean purchasing every Ability Tree upgrade. Movement skills and the upgrades bought with ability points serve different roles. Charge Dash, for example, augments Dash through the Ability Tree.
Before preparing a submission, read the selected category’s rules, including its timing method and restrictions. Compare attempts within the same category and version so your splits measure the same route.
Official page: Ori and the Blind Forest (store.steampowered.com)
Build a Reliable Early Game
Early Ori movement looks simple, but the opening already asks you to coordinate attacks, experience pickups, health, and saves. Establish a repeatable opening before adding shortcuts that depend on arriving with precise resources.
 Image: Steam / Moon Studios GmbH
Control Spirit Flame Instead of Mashing
Spirit Flame has an attack rhythm. In the advanced opening, the jumping enemies nicknamed “Frankies” take five attacks each. The optimized pattern uses a single attack, a cooldown, and then two pairs of attacks.
Practice that rhythm while keeping Ori positioned for the next jump. Finishing an enemy quickly offers little benefit if you then have to turn around for its experience.
Quick Flame later changes the available attack grouping. Keep your combat practice aligned with the upgrades used by your route.
Learn Wall Movement Before Difficult Skips
Wall Jump allows repeated jumps off walls, while Double Jump adds another airborne adjustment. Advanced movement combines these tools with brief neutral inputs to control distance from a wall.
Practice these fundamentals:
- Approach walls without drifting farther away than necessary.
- Use Double Jump deliberately when adjusting height.
- Connect landings to the next movement instead of stopping to reassess.
- Learn a safe passage through a room before attempting its faster shortcut.
Dash then changes the pace of traversal. In the Definitive Edition All Skills route, reaching it early opens faster movement across much of the remaining map.
Keep Beginner Safety Pickups
Advanced routes skip health upgrades to save seconds. That leaves many later hazards capable of killing Ori immediately.
Keep nearby safety pickups while learning. An Ori and the Blind Forest speedrun benefits more from a completed segment than from saving a few seconds before losing a minute to a death.
The same principle applies to checkpoints: place them before difficult sections when your energy allows it.
Route Experience, Energy, and Soul Links Together
Experience is more than progress toward another ability point. Leveling up fully restores health and energy, creates a damaging explosion, and awards an ability point. Advanced routes arrange pickups and enemy kills so those effects happen at useful locations.
 Image: Steam / Moon Studios GmbH
| Resource or mechanic | What it provides | Routing consequence |
|---|---|---|
| Spirit Light experience | Progress toward a level-up | Enemy kills and pickups affect refill timing |
| Level-up | Full health and energy refill, an explosion, and an ability point | Can support door entry, survival, and obstacle clearing |
| Energy Cells | Increased maximum energy | Change how much energy Ori can hold |
| Ability Cells | An ability point | Support planned Ability Tree purchases |
| Soul Links | Player-created checkpoints | Reduce the distance lost after an accidental death |
Understand the Four-Energy Door Trick
The Frankie walk demonstrates how resource planning creates a sequence break.
Ori reaches an energy door requiring four energy while carrying a maximum of two. The route handles that mismatch by arranging a level-up beside the door:
- Put two energy into the door.
- Kill the nearby Frankie with experience positioned for a level-up.
- Use the level-up’s energy refill.
- Put the remaining two energy into the door.
That opens access toward the right side of the map and an earlier Double Jump. The setup depends on experience timing as well as enemy positioning.
For your own Ori and the Blind Forest speedrun notes, record the experience state before important kills. “Kill this enemy” leaves out the reason the setup works; “kill this enemy to refill energy here” gives you something useful to diagnose.
Spend Energy With the Next Refill in Mind
Late-game movement uses Charge Dash extensively. It consumes energy, but certain interruptions—including Bash and Stomp—can cancel it and refund that energy.
Practice the intended cancellation alongside the dash. Otherwise, one uncanceled movement can leave you short for a later trick.
Keep the resource display visible while learning these sections. Check your energy after each unfamiliar combination, especially before a door, checkpoint, or extended movement chain.
Understand the Major Definitive Edition Tricks
Advanced All Skills routing combines movement techniques with changes to saving, cutscene handling, and dungeon progression. Learn what each trick accomplishes before trying to reproduce an entire fast segment.
 Image: Steam / Moon Studios GmbH
| Technique | Core effect | What to practice |
|---|---|---|
| Save Anywhere cutscene skip | Uses a stored ability-menu setup to save after crossing a cutscene trigger, followed by a reload | Trigger position, ability-point use, and reload timing |
| Rekindle cutscene skip | Updates a nearby Soul Link after crossing a trigger | Save placement and the movement across the trigger |
| Keystone duplication | Uses an intentional death setup to retain keystones while making pickups available again | Checkpoint state and the pickup sequence |
| Double Bash | Enables movement setups involving repeated Bash interactions | Ori’s direction and the projectile’s behavior |
| Grenade jump | Combines a wall Charge Jump with tightly timed Light Burst use | Positioning and the precise input window |
Cutscene Skips Depend on When You Save
The central idea behind several skips is saving after crossing a cutscene trigger, then quitting and reloading.
Save Anywhere uses ability-menu storage to make that possible in situations where an ordinary save would not work. Another variation places a Soul Link near the trigger and rekindles it after crossing.
These methods have different resource requirements. The ability-menu version uses an ability-point purchase; the nearby-save variation avoids spending an ability point for that skip.
Practice one cutscene at a time. Track where the trigger sits, which save method the route uses, and where Ori should appear after reloading.
Bash Changes Both Movement and Routing
Bash launches Ori in one direction and sends its target in the opposite direction. Enemies, projectiles, and lanterns become movement tools.
Advanced swamp entry adds another consideration: the distance a frog projectile travels depends on Ori’s distance when the shot spawns. Double Bash interactions then help arrange the movement needed for the sequence break.
Separate those tasks during practice. Learn where to stand when baiting the shot, then work on the Bash sequence.
Skipping Ginso Escape Has a Later Cost
The advanced All Skills route collects Bash, uses keystone duplication, and leaves without completing the Ginso escape. It then reaches the swamp through a sequence break to obtain Stomp.
That shortcut leaves the water poisoned. The consequence matters during the final escape, where contact with water remains dangerous.
Carry that detail into your endgame practice. An Ori and the Blind Forest speedrun route changes more than the order of rooms; an early skip can change what is safe much later.
Leave Frame-Perfect Tricks for Focused Practice
Grenade jumps use an extremely tight timing window: the showcased technique places the Light Burst input within a single frame at 60 frames per second.
The Mount Horu door warp also requires precise timing around reloading and entering a door. It can send Ori to the end of the dungeon.
Practice those tricks separately before relying on them in full attempts. Keep a clear distinction between a successful setup and a recovery so you can recognize which state you are in.
Turn Practice Into Faster Completed Runs
Divide your Ori and the Blind Forest speedrun into sections with clear starting resources and recognizable endpoints. Practice the movement, then connect neighboring sections without changing the pickup plan.
| Practice section | Main focus | Check before continuing |
|---|---|---|
| Opening through Dash | Attack rhythm, Wall Jump, and saves | Health, energy, and experience |
| Double Jump through Bash | Air control and Ginso traversal | Checkpoint position and intended pickups |
| Swamp and valley | Projectile setups, Stomp, and Charge Flame | Enemy positioning and ability points |
| Sorrow Pass and Misty Woods | Charge Jump and Charge Dash combinations | Energy spent versus energy refunded |
| Mount Horu and final escape | Door timing and escape movement | Health, energy, and poisoned-water avoidance |
Separate Supersonic Practice From Advanced Routing
For Supersonic, focus on navigation and dependable execution. Learn where progression takes you, avoid collectible detours, and practice the escape sequences before starting a timed attempt.
Use short walkthrough segments when learning: watch a section, play through it, then move on. Keep practice saves separate from a continuous leaderboard attempt.
Do not automatically combine Supersonic with Elite, which requires finishing without spending an ability point, or Immortal, which requires finishing without dying. Choose the challenge you want to practice and plan around it.
Learn Recoveries Alongside Shortcuts
Before committing to a difficult trick, identify:
- The checkpoint you will return to after a death.
- The resources another attempt consumes.
- Whether a required enemy is still alive.
- The ordinary route forward if you abandon the shortcut.
Those questions matter around Charge Dash setups, where accidentally killing an enemy can remove a movement target.
Review failed segments for their cause. If your energy was already wrong before the trick began, practicing the final input alone will not solve the problem. Fix the pickup, cancellation, or save that caused the shortage, then reconnect the section.
FAQ
Do you need glitches for an Ori and the Blind Forest speedrun?
No. You can pursue the under-three-hour Supersonic achievement through the intended story route without major glitches. Advanced Definitive Edition categories also use cutscene skips, sequence breaks, and precise movement techniques.
Does All Skills require every Ability Tree upgrade?
No. All Skills focuses on collecting the game’s skills. Ability Tree upgrades are separate purchases, though specific upgrades such as Charge Dash are important to the advanced route.
Why do speedrunners level up beside energy doors?
Leveling up restores energy. At the four-energy door, the route deposits two energy, triggers a planned level-up by killing a nearby enemy, and deposits another two.
Why is the water poisoned during the final escape?
The advanced All Skills route skips the Ginso escape instead of cleansing the water through that sequence. The water therefore remains hazardous during the ending.
Continue with
 Ori and the Blind Forest Walkthrough: Story & SecretsUse this Ori and the Blind Forest walkthrough to plan your route, manage Soul Links, track missable collectibles, and prepare for the Mount Horu escape.
More in Guides
Ori and the Blind Forest Can You Play After Completion?
Ori and the Blind Forest can you play after completion? Learn how saves influence backtracking, missable achievements, collectibles, and your 100% cleanup.

Ori and the Blind Forest Definitive Edition vs Original
Ori and the Blind Forest definitive edition vs original: compare new areas, abilities, fast travel, difficulty modes, and Steam extras before you choose.

Ori and the Blind Forest Difficulty: What to Expect
Understand Ori and the Blind Forest difficulty, choose your starting mode, manage Soul Links, and prepare for demanding platforming and escape sequences.
Ori and the Blind Forest How Long to Beat: Time Guide
Ori and the Blind Forest how long to beat: compare story, exploration, and 100% completion times for both editions, plus tips to plan a full playthrough.
Join the community
Game links and player communities: